Today we have a guest written post! I couldn’t be happier to introduce y’all to my new friend Melanie. She hails from Tennessee, she is funny, wise and loves the Lord. We were fast friends! This blogging community is so fun that way. Today she is posting her adventures in painted furniture on the blog. I guess you could say I am starting the summer off with a blogcation…a vacation from the blog. Please show Melanie some love by heading over to her site after you read this great tutorial that I am gonna be trying out myself soon! Happy summer and happy painting friends!
“I Painted a Sofa – Really!”
For months now, I have talked about painting a sofa.
I’ve read many articles and blogs about painting fabric on furniture. It sounded like a crazy idea, but it interested me as well.
Some of my favorites sites (and the most helpful) include: 11magnolialane, addicted2decorating and abeautifulmess.
You can click on these links to see tutorials and lots of pictures.
Before launching out on an entire sofa, I helped a friend paint an old chair. She had gotten it at a garage sale and disliked the fabric.
However, she loved the frame of the chair and wanted to repurpose it.
So, we did.
Here is the chair before we painted it:
Basically, my friend chose the easiest route to paint the chair – she just applied the paint directly onto the chair – no watering it down, no fabric medium used.
She went for it – wooden legs and all. And, it turned out great! Here is the chair just after she painted:
Here’s a photo of the chair before and after:
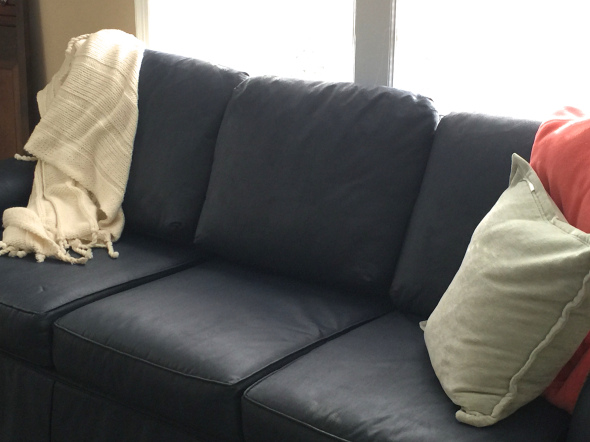
The chair turned out kind of “leathery.”
It looks and feels like a fine leather piece of furniture now. And, her kids really thought she had gone out and bought a new leather chair.
That was last summer…
Fast-forward to last week when my daughter and her roommates wanted to recover an old sofa or buy a new one.
I suggested we paint the sofa instead.
So, we began to gather materials and plan our painting party. For this endeavor, we gathered supplies.
Supplies we used:
~ Several large tarps – (this is a messy project)!!
~ Paint brushes – (these do not have to be expensive or special; just sturdy).
~ Several plastic bins/cups (For mixing the paint, water and fabric medium together. We also painted out of these cups since they were so easy to hold).
~ Several large spray bottles (If they spray a mist, that’s even better).
~ 1 Gallon of premium paint – I chose Valspar eggshell finish at Lowes (For a chair or smaller piece, you may only need a quart or half a gallon).
~ Approximately 40-50 ounces of Fabric Medium (I needed more than I first bought; I kept having to go back to the store for more. If I do this again, I’ll just order it through either Hobby Lobby or Amazon.com. You can get 56 ounces at Amazon for about $45; Hobby Lobby has it just a tad cheaper online. Fabric medium is what makes the fabric softer).
~ Some help with the project – enlist at least one other friend to help; this is too much to attempt alone!
Here are the steps that we took:
Step One – Clean and brush off the couch.
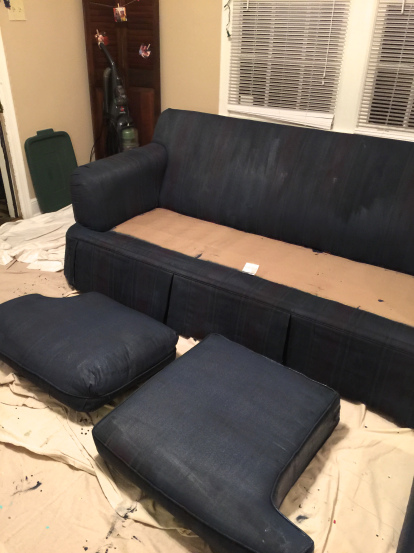
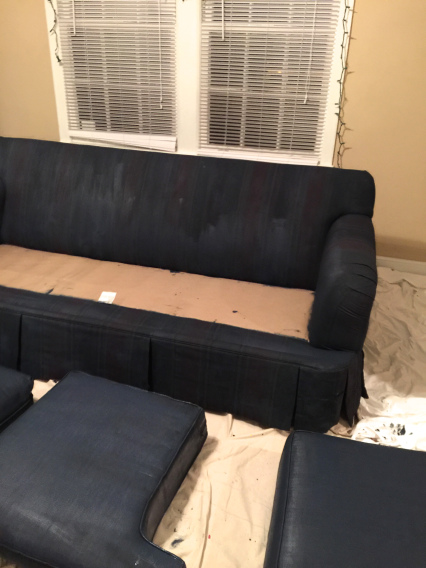
After gathering materials and enlisting help, we started cleaning the couch. Our couch was is great shape, but no one was using it or wanted it. So, we vacuumed and removed the cushions and brushed off all crumbs and such. A white cat had “owned” our sofa before we got it. We had to rid the couch of all of her stray white hairs.
This is what our sofa looked like when we began:
Step Two – Pull off all cushions and lay them out flat on the tarps.
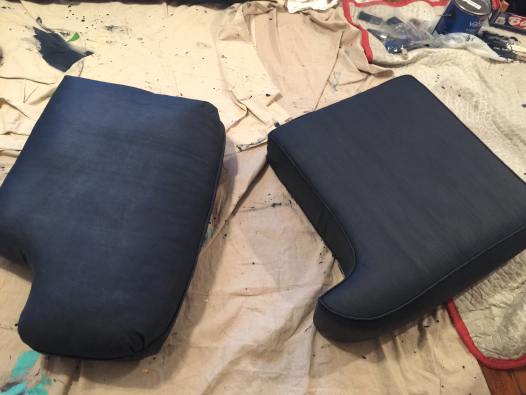
We started with the cushions. We laid them out on tarps across the area. Our sofa actually had six large cushions which required much space for painting and for drying. These cushions also added to the amount of paint that we needed. I was so glad that we had bought a gallon of paint.
Here is what the cushions looked like when we began:
Step Three – Mix the paint, water and fabric medium.
Since we were working with lots of helpers, I mixed the paint and then poured it into small plastic cups for the others to use. I would mix it a little at a time: 4 oz. paint, 4 oz. fabric medium, 3-4 oz. water. I would start with fabric medium, then add paint and water.
Once the paint mixture was complete, we tackled the first coat starting with the sofa cushions.
Step Four – Spray and mist well.
Soak that sofa and those cushions with an ample amount of misted water. This will soften the fabric and make the paint go on easier.
Once we sprayed, we started to paint. The first coat kind of looks like a primer coat. It’s thin, and you will still be able to see the fabric through the paint – at least a little.
While the girls worked on the cushions, I tackled the couch itself. I sprayed it down and then started adding the paint mixture.
The first coat took us the longest and at times was tedious. (Our couch has a little skirt that goes around the front and two sides. This skirt was the hardest part, by far).
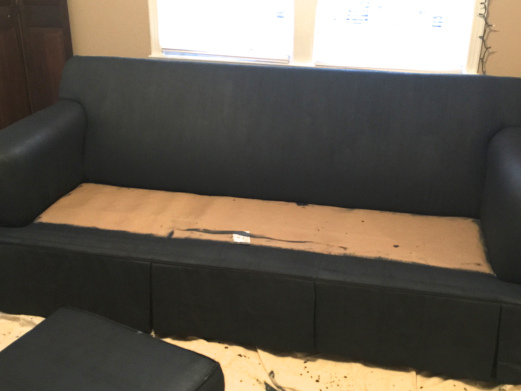
We finished the first coat on Monday night and allowed it to dry overnight. Here is what it looked like after our first night: (If you look closely, you can still see the red and green in the original fabric)
Step Five – Add a second coat just like the first coat.
Early on day two, we added a second coat of the paint mixture and continued to spray everything well with the spray bottles. This mixture was still 1:1:1 paint to water to fabric medium. This second coat went on much easier. (When I try this again, I will apply the sprayed water even more liberally. This seems to make the painting even easier).
Step Six – Let everything dry really well.
We let things dry until that evening, about 8 hours.
Step Seven – Paint the final coat.
This is a more regular and thick coat of paint.
We mixed the paint to be thicker this time. We stirred up 1:1 paint to fabric medium with just a touch of water. Stir it well and lather it on.
One of the tutorials suggested four coats of paint, but I was getting weary with my project. So, I made sure that my third coat was nice and thick. I was adding the third coat as if it was my final coat. (It worked)!
I sprayed liberally the water mist on this last coat. Then, I painted every nook and cranny and made sure every spot was covered. This last coat went on well and without any trouble.
Here is the way it the couch looked after three coats:
Step Eight – Let the final coat dry really well.
We left it all overnight to make sure everything was dry.
Step Nine – Check for any debris and brush of the fabric as needed.
There was a little static cling with our sofa cushions causing some fuzz to land on our fabric.
Step Ten – Soften the couch cushions by walking on them.
We put on thick socks and walked around on the cushions.
This loosened up the fabric and any places where the paint was too thick or had bunched up. (If you have little kids, you could let them jump on the cushions – really~~)
Step Eleven – Put it all back together and enjoy the work of your hands!
Even the girls who didn’t help much-loved putting it all back together.
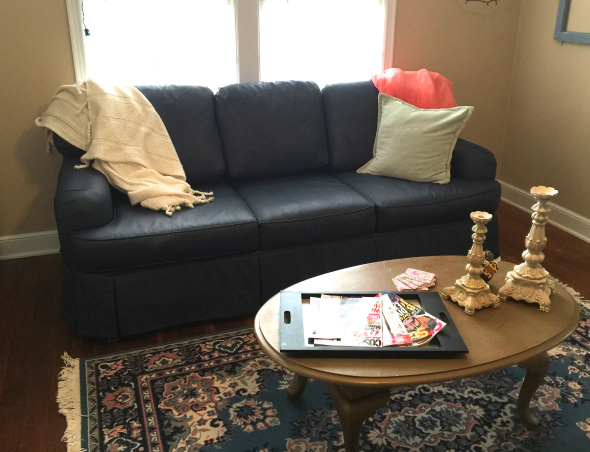
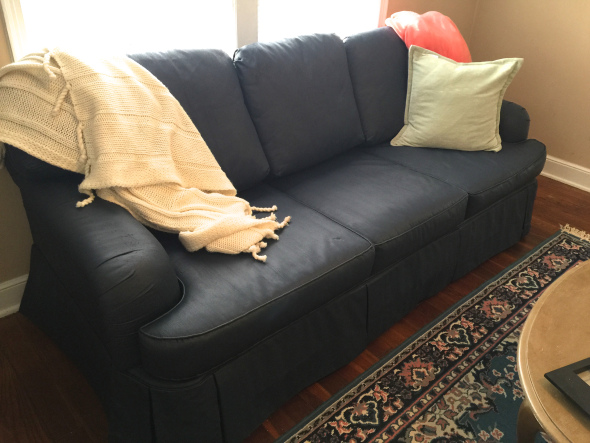
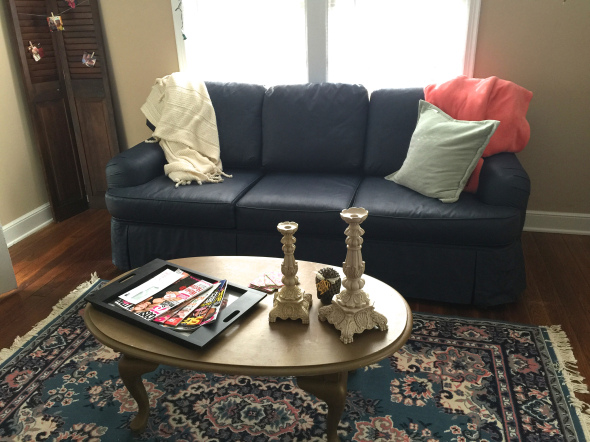
And, although the girls tell me they want to do some more “adjusting of decorations,” here is the result:
Thought it turned out pretty amazing! We are really pleased with the results!
So, how does it feel to sit on?
~ It’s a little stiff, but it was never a soft, comfy couch. It feels like outdoor cushions a bit. Maybe a little like a leather couch. However, we added soft throws and pillows to the mix, and we have a great couch for the girls’ living area.
What did it cost?
Considering that a recovered couch could cost several hundred dollars and a new couch even more, we felt great to complete this project for under $125.
Here is how our costs broke down:
- Gallon of Paint – $33
- Fabric Medium – $50
- Brushes, spray bottles and Supplies – $40
- Already had tarps, plastic bins and decorative throws and pillows for the couch – $0
- Total Cost – $123
 What would you do differently next time?
~ Get more help – enlist more friends to assist me.
~ Spray the water on much more liberally.
~ Buy fabric medium in bulk – I had a hard time finding this stuff!
~ Plan a manicure just after completion – I’m still getting that navy paint off of my nails and hands!
The girls love it, and so do we!
It looks like we bought a brand new, gorgeous blue sofa.
Well, there it is – a painted couch.
As I close, I think of the most appropriate verse that applies to this project: Then the One sitting on the throne said, “Look! I am making everything new!” Also he said, “Write, ‘These words are true and trustworthy!'” (Revelation 21:5)
Jesus can make our lives brand new just as we made that old sofa like new! If you aren’t experiencing the newness of a refreshing relationship with the Creator of this universe, you can! I’d love to talk to you about Him. Melanie
Brief Bio: Melanie Redd is a lifelong Memphian who has enjoyed some short layovers in Texas, Georgia and North Carolina. Married to Randy for 24 years; the couple has two college-age children. She authored curriculum with Lifeway for over 10 years before starting her own speaking and writing ministry. Her passion is to offer practical HOPE to her readers – encouragement with a large dose of common sense and a little humor. You can reach out to Melanie through e-mail [email protected] or please visit her website www.melanieredd.com
Her books are: Stepping Closer to the Savior and Looking for Amazing Women in Baptist History.




Kim, I just recently started following your blog, and I thoroughly enjoy you and love the message you bring! Thanks so much for sharing your blog with Melanie today! I have been reading about painting upholstery, but was hesitant to try it. Now, I think I’m ready to go for it! I look forward to your posts!
Your sister in Christ
Elaine
Elaine – I am so glad you have come to visit. Your words were the much needed encouragement I prayed for today. I appreciate you letting me know you are here. Hope you enjoy the blog. Please let me know how your painting project goes! thanks being an encourager
Could you please leave or send me a link to Melanie’s blog? I wasn’t able to find one within the post. Thanks –
Peace,
Elaine
Of course! It is http://www.melanieredd.com it is also at the end of the post. She will love having you too!
Thanks, Kim!
Appreciate you sharing my blog post on your site!
Love your site and love the ministry that God is unfolding before you!
Keep going strong,
Melanie
thanks Melanie! You rock and I am so glad to have you on this journey!